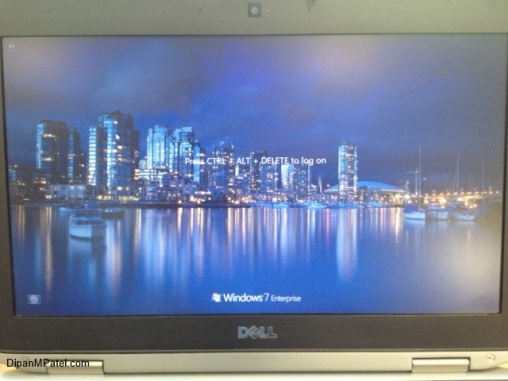
Changing the Windows 7 Lock screen wallpaper
1 – Click Start then type Regedit into the Search Programs and Files box and press Enter.
2 – Expand HKEY_LOCAL_MACHINE and drill down to \SOFTWARE\Microsoft\Windows\CurrentVersion\Authentication\LogonUI\Background and double click on OEMBackground and change the value from 0 to 1 then click OK and close Regedit.
3 – Browse to C:\Windows\System32\oobe then create a folder called images (You will place your custom wallpaper here)
4 – Place your wallpaper in the folder above and rename it to “backgrounddefault”
5 – The moment of truth, press Control + Alt and Delete and the wallpaper would have changed.
Windows XP mode has crashed
I installed Windows XP mode on my Windows 7 system and after using it for a few months without any problems one afternoon the VM became unresponsive and would not shutdown properly. Whenever I clicked on “X” it threw up a message saying something like “Windows XP mode is currently shutting down” <– I can’t remember the exact message but it was something along those lines.
I checked the settings and under Close it was already set to Shut down. After pressing Action and Close I got the same message.
In the end I opened Task Manager from the host system and terminated the following processes.
VMWindow.exe and vpc.exe, then the machine powered down. A bit extreme but it was the only way.
Hope this helps! 🙂
Installation Failed Error Code 135 – When installing SUP in Configuration Manager 2012 SP1
After installing my Configuration Manager 2012 lab in a CAS > Primary hierarchy, confirmed that the replication link was active in Monitoring > Database Replication and then began to install WSUS\SUP to be able to deploy Windows Updates.
I installed WSUS via the Server Manager then installed the SUP on the CAS first then done the same on the primary server the only difference really being that the Primary server points to the CAS (Upstream Server) for Windows updates and the CAS points to Windows Update.
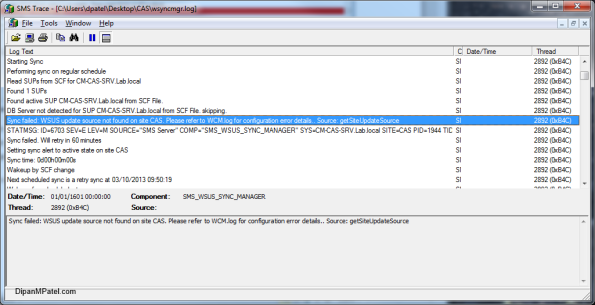
I attempted to synchronise the CAS with Windows updates but I got the following errors.
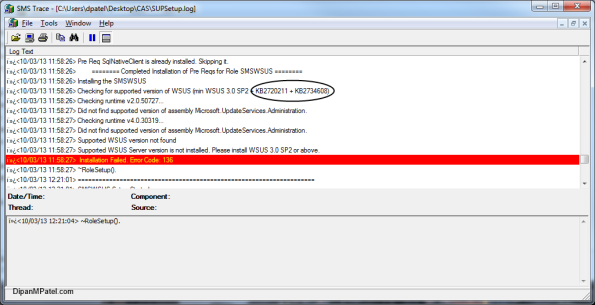
The SUPSetup.log showed below.
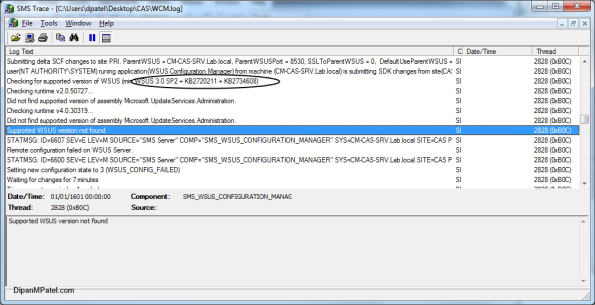
Looking at the above I knew I didn’t install updates WSUS-KB2720211-X64 and WSUS-KB2734608, (these updates are needed with Configuration Manager 2012 SP1) I installed these updates on both the CAS and Primary servers and rebooted then ran a sync and I was able to pull updates from Windows Update on the CAS, the primary then pulled the updates from the CAS.
Below are the errors in the following log files before the updates were installed, after the updates were installed showed the updates synchronising.
Wsyncmgr.log
WCM.log
Hyper-V Live Migration Lab
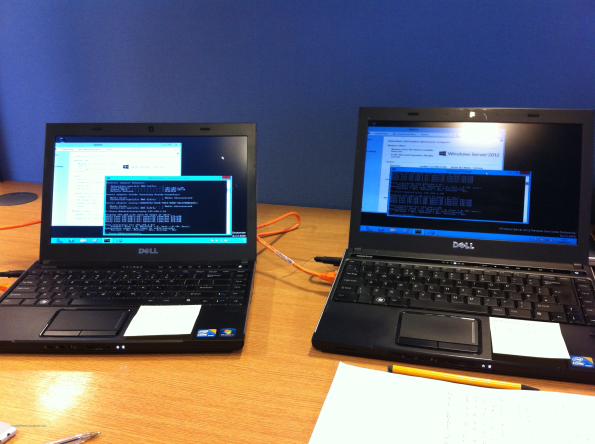
Below are the configuration steps I used to setup my Live Migration Lab using two laptops and a crossover cable.
Windows Server 2012 allows you to perform live migration on VMs which are not part of a cluster; however there is some additional configuration to do. Perform the following steps on both servers (Laptops :-)) running Hyper-V.
Open “Hyper-V Manager” then right click the server and select “Hyper-V Settings”
Click on Live Migration; place a tick in “Incoming and Outgoing Live Migrations” you then have the option for Authentication Protocol. Since this is a lab environment it doesn’t really matter which you choose although both have advantages and disadvantages. I decided to use Kerberos.
CredSSP – requires no configuration, however you cannot perform live migrations through Hyper-V on a remote system.
Kerberos – You can be logged on remotely to perform a live migration, however additional configuration is needed. (See below)
I then selected the option “Use any available network for live migration”; you may want to specify an IP address in a production environment. Click “OK” once you’re finished.
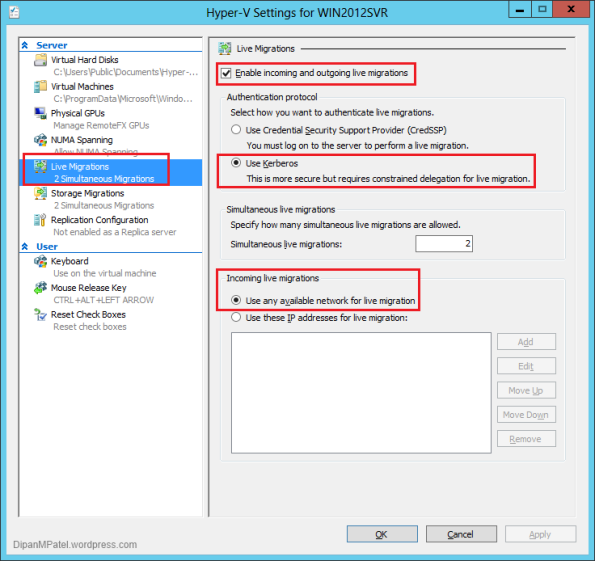
Remember you must duplicate this on your other server (Laptop) running Hyper-V
Constrained Delegation
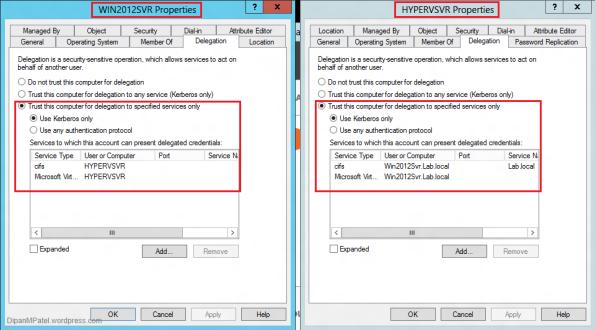
Open Active Directory Users and Computers then find the computer object for the server in this case HYPERVSVR then right click and scroll down to “Properties” and click on the “Delegation” tab.
Select the option “Trust this computer for delegation to specified services only” select “Use Kerberos Only”
Under “Services to which this account can present delegated credentials:” Click on “Add” then select the server WIN2012SVR and add the services CIFS and Microsoft Virtual System Migration Service and click “OK” to close the dialog box then “OK” a second time.
Do this again for the server you are migrating too, in my case it would be HYPERVSVR and add the CIFS and Microsoft Virtual System Migration Services. (See the two dialog boxes of the server properties.)
At this point most of the configuration is complete, we do need to create a virtual switch on both Hyper-V servers.
Creating the Virtual Switch
You will need to perform the following on both of your Hyper-V servers:
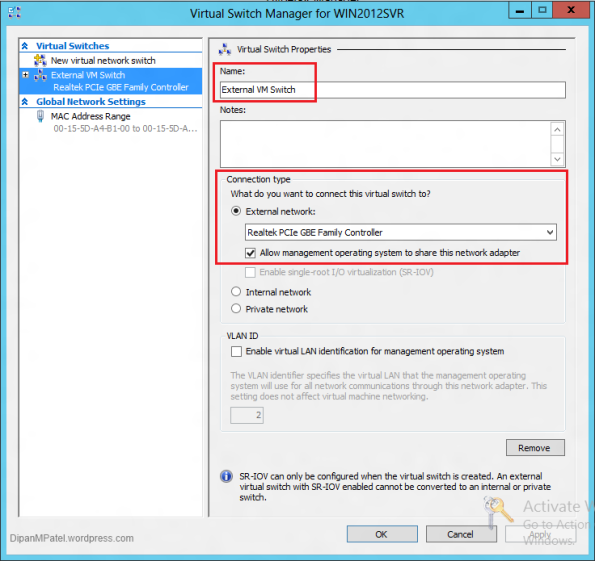
Open “Hyper-V Manager” and click on “Virtual Switch Manager”, select “External” from the “Create Virtual Switch” menu then click “Create Virtual switch.” (I already created one called “External VM Switch”, not the most original name :-))
Enter a name for the virtual switch; the name must be the same on the both Hyper-V servers.
Under “Connection Type” select the “External network” radio button then use the drop down and select the network adapter that the crossover cable is connected to and click “OK”. The virtual switch is then listed under “Virtual Switches”.
OK we are nearly there, one last configuration step before we can test Live Migration, the final step is to add the network adapter of the virtual machine you are planning on migrating to the virtual switch you just created in the above step. (External VM Switch)
Open “Hyper-V Manager” then right click the virtual machine (WinSVRTest1) scroll down to “Settings” then select “Network Adapter” (See below)
Use the drop down menu under “Network Adapter” and select the Virtual Switch you created then click “OK” and we are done. Now the test!!!
Performing the Live Migration
Currently both of my VM’s are on Win2012SVR (See the below screenshot) I would like to move WinSvrTest1 to HYPERVSRV.
Right click the VM you would like to migrate and scroll down and select “Move” the wizard then begins. The VM I am moving has been switched on and the Windows Firewall disabled so I can ping the VM as it is migrated, this VM is in a workgroup.
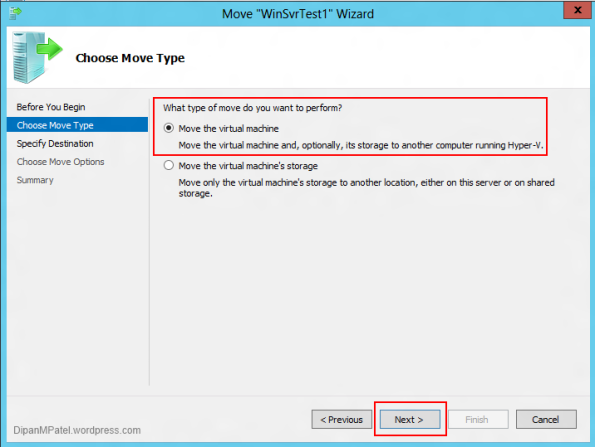
Click “Next”, The “Choose Move Type” dialog appears for this test I chose to move the VM and storage to another server, but you do have the option to move only the VM storage. Click “Next”
Click on “Browse” on the following screen and type the name of the server you are moving the VM too, click “OK” then “Next.”
Choose Move Options, for this test I selected “Move the virtual machines data to a single location” and click “Next”
The destination locations either select a share you have previously created on your Hyper-V server or select the root of c:\ and click “Next”
The move then begins. I setup a continuous ping to the test machine so I can see when the network connection drops.
As you can see I lose two ping packets as the move completes and WinSvrTest1 has disappeared from the Hyper-V Manager window.
You can see the VM is now on HYPERVSVR. 🙂
Hope this helps!!
2 Laptops a crossover cable and a pizza place no wait Window Server 2012 R2
Below are the details of the lab I created to help prep me for the 70-417 exam. I also used the “Upgrading Your Skills to MCSA Windows Server 2012” Exam ref by J.C. Macklin and the Windows Server 2012 Jump Start videos found here:
My lab setup
- 2* Dell Vostro 3300 laptops
- Windows Server 2012 R2 downloads from here (I downloaded the ISO for this lab)
- 1* Crossover cable
- 1* RedBull (Optional :-))
| Laptop Configuration | Roles Installed | Network Configuration |
| Hostname – Win2012SVR | ADDS | IP Address – 192.168.1.60 |
| Domain – Lab | DNS | Subnet Mask – 255.255.255.0 |
| Processor – Intel i5 2.27GHz | File & Storage Services | Default Gateway – 0.0.0.0 |
| Memory – 4GB | Hyper-V | Primary DNS – 127.0.0.1 |
| Hard Drive – 300GB | Alternate DNS – 192.168.1.60 | |
| Laptop Configuration | Roles Installed | Network Configuration |
| Hostname – HyperVSVR | File & Storage Services | IP Address – 192.168.1.61 |
| Domain – Lab | Hyper-V | Subnet Mask – 255.255.255.0 |
| Processor – Intel i5 2.40GHz | Default Gateway – 0.0.0.0 | |
| Memory – 5GB | Primary DNS – 192.168.1.60 | |
| Hard Drive – 300GB | Alternate DNS – Blank | |
Note: You can make up what IP addresses you want to set, or you can copy the above.
Once you setup one laptop as a Domain Controller (Win2012SVR in my case) you will need to join the other laptop to that domain (HyperVSVR) at this point you would have connected both laptops together via the crossover cable. I built lab this for the sole purpose of learning about Hyper-V live migration but you can also use it to learn about the other features of Windows Server 2012 R2.
Test connectivity between the two laptops by pinging both by IP and Hostname. The HyperVSVR I disabled the Windows Firewall and was then able to receive Pings from Win2012SVR.
You will not be able to cover everything in this lab that is mentioned in the “Upgrading Your Skills to MCSA Windows Server 2012” book; however it’s a good start to your studies.
If you are planning on taking the Exam I hope this helps and GOOD LUCK!! 🙂
Blog post on Hyper-V Live Migration Lab Setup is here
Encrypting USB pen with BitLocker To Go
I decided to encrypt my USB pen the other day using BitLocker To Go, there was no real requirement for me to do this since the data on the drive wasn’t important or sensitive it just dawned on me that I haven’t “played” with this feature of Windows 7 Enterprise yet.
So, I plugged in my USB pen then made my way to the BitLocker Drive Encryption applet in the Control Panel and clicked on “Turn on BitLocker”
The wizard then launches and you have the option to use a password or smart card, in my case I selected the password option and entered in what I thought at the time was a secure password…….looking back, it’s wasn’t! I then clicked “Next” to continue.
The next option asks how you would like to store the recovery key; I chose to “Save the recovery key to a file” then browsed to My Documents folder. (You cannot save this to C:\), Click “Next” to continue.
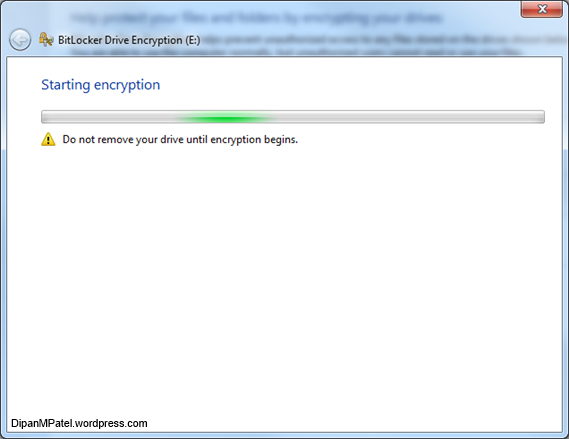
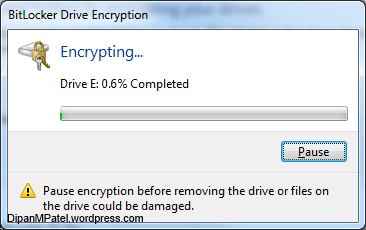
Click on “Start Encrypting” to begin.

Once the encryption is complete I removed the USB pen and re-connect and the prompted with the below dialog box to enter in my “secure” password and click “Unlock” Very straightforward and simple to setup, just don’t forget the password or lose the recovery file. 🙂
Changing network adapter priority in Windows 7
Have you noticed that Windows 7 seems to prefer the Wifi connection over Ethernet even if both are connected at the same time? Well this didn’t really bother me to begin with but over time it did! So to remedy this I decided to look into why and how to fix it……..First step Google!
I read a few interesting articles and found some things worked better than others and after some trial and error I got what I wanted.
Why? I found this article on the Microsoft support site that explains the Windows uses the adapter with the lowest metric. It also explains how to alter the metrics. I did play about with this and after running Network Monitor on both adapters before and after the change found that it didn’t work, well at least not on my machine. (I only tested on the one system)
How?
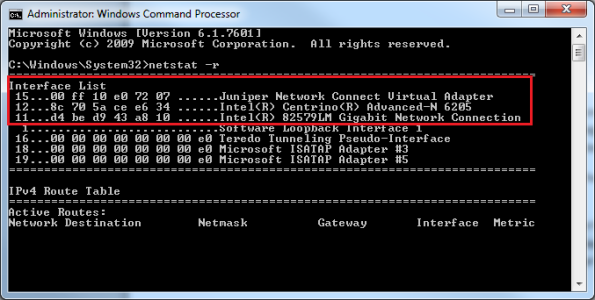
First we need to see the current order the adapters are prioritised in. So launch the CMD and enter netstat –r (Full list of switches are found here)
As you can see I have VPN software installed which is listed first, followed by my Wireless adapter then in third place the Ethernet.
At this point I decided to run a capture from Network monitor for all listed adapters. (Ignore the blacked out area :-))
As you can see Outlook using the Wifi. (Note, you will see some Ethernet connections like ARP broadcasts etc., I’m interesting in seeing what connection the apps are using)
To change the adapter priority navigate to Control Panel\Network and Sharing Center then click on Change adapter settings, from this window click on Organise then scroll down to Layout then click on Menu bar. (This brings up the familiar File\Edit\View menus) Click on Advanced and select Advanced settings, from Advanced settings dialog box you can use the arrows to move adapters up\down.
The screenshot above shows the menu after I’ve moved the Local Area Connection to the top.
OK so you’ve changed the adapter priority, now to reboot the machine and test! I ran another network capture.
I did look at other applications I had running on my system for both Network captures to verify but for the screenshots only chose to highlight Outlook.
Below another Netstat –r after the changes were made.
As you can see the WiFi adapter has now dropped into 3rd place.
Hope this helps!!
Unable to Start WDS – Error 1053:
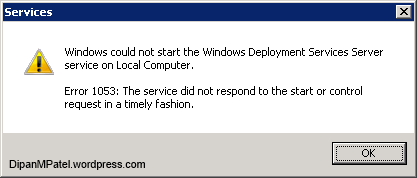
This morning I attempted to PXE boot a laptop, when it failed I decided to do some digging to find out why. One of the troubleshooting step I took was to restart the Windows Deployment Services from the Services MMC console, when I tried I got the below error message.
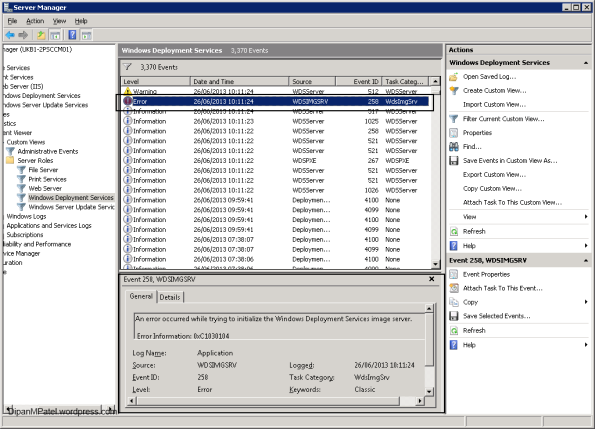
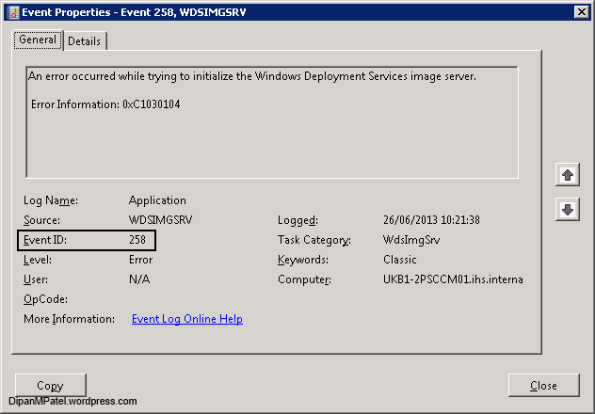
I then opened Server Manager and looked at the WDS event logs and found the below.
Note: This server does have SCCM installed but no configuration has been done to WDS.
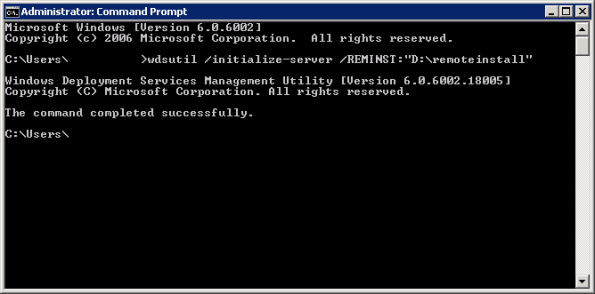
I ran the below syntax via the command line then manually restarted the service again through the MMC console and it worked I was able to PXE boot the laptop.
wdsutil /initialize-server /REMINST:”D:\remoteinstall”
Note: D:\ is the location of the Remoteinstall folder on this server.
Removing IE10 from Windows 7
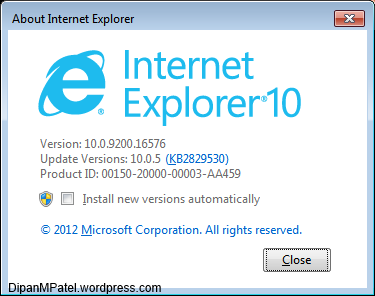
Have you like me accidentally installed Internet Explorer 10 on your system? Well fear not! Removing it is quite simple although your system will need a reboot as part of the process.
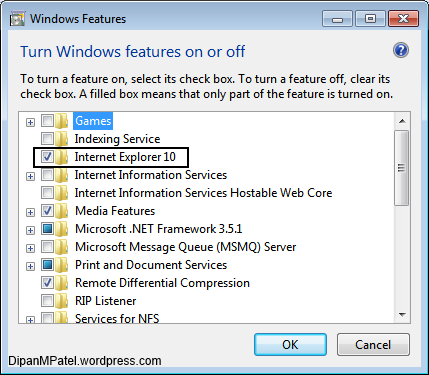
Navigate to Windows Button\Control Panel\Programs and Features then click on the “Turn Windows features on or off” link, (See dialog box below) then untick Internet Explorer 10.
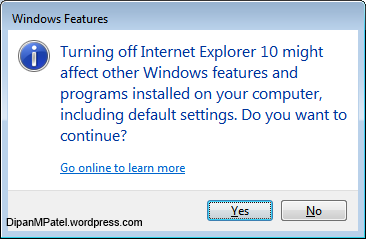
Click Yes to the dialog box that appears.
Windows then begins the process of removing IE10.
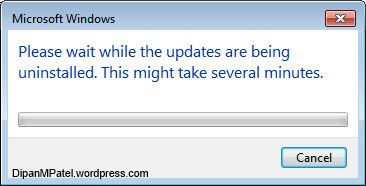
Once the dialog box finishes, navigate back to “Programs and Features” then click on “View installed updates” and find Microsoft Internet Explorer 10 update, single click to highlight then click on Uninstall.
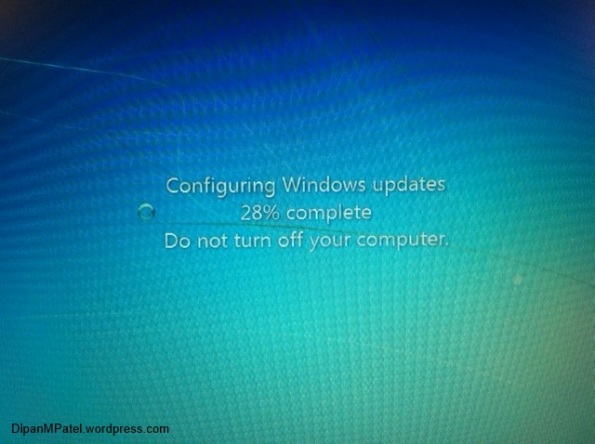
After you’ve clicked uninstall you get the above dialog box, wait for this to finish then reboot the computer.
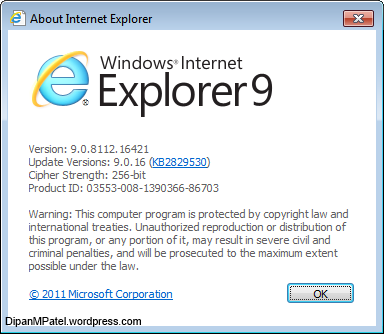
Once the computer restarts Internet Explorer 9 is available to use, however if you are running Windows 7 x64 then Internet Explorer 9 x64 is pinned to the taskbar by default, I unpin this and pin the x86 (Image above) as the bespoke software I use runs better.
There you have it! The removal of IE10
Re-creating a Window 7 Profile
A new blog post for an old topic, I’ve had to re-create a Windows 7 profile a few times since its release to troubleshoot various issues and every time I’ve forgotten the location to the hive key so to save some time searching on the internet, finally I’ve decided to post it somewhere I won’t forget – my blog! 🙂
In Windows XP this was a simple task, you would just rename the profile folder (I like many others I’m sure would just put the word “Old” in front of the username) then log in as the user and the profile would be re-created. This is not the case in Windows Vista\7 there is an additional step of deleting a registry key. I tend as a precaution not to delete the profile just rename it and also export the registry to C:\ as a backup should anything go wrong.
Steps to re-create the profile:
1 – Login as administrator or an account with local admin privileges then rename the profile folder.
2 – Export the registry to the root of C:\ as a backup.
3 – Delete the registry key that corresponds to the profile. (Hive Key location below)
HKEY_LOCAL_MACHINE\SOFTWARE\Microsoft\Windows NT\CurrentVersion\ProfileList
4 – Restart the machine then login as the user for the profile to be re-created.
5 – You of course would then need to copy files from the desktop\My documents\Favorites from the old profile to the new. (Optional, but recommended to keep the user happy! Let face it, it’s why we are here. :-))
Note: If you do not delete the registry key and just rename the profile, when you log back in as the user Windows loads a temp profile for you.
One last thing, once you’re happy the profile re-creation was successful you can delete the registry backup you created in step 2.
Current profiles on my system! ^

