Archive
Task Sequence has failed with error code 0x80070661
The other day I came across the below error message during OSD deployment in my lab, this threw me for a minute mostly because I’ve used the TS many times in the past without any issue.
I examined the SMSTS.log file and as soon as I saw the error I knew what the problem was, basically in my rush to get a system created to work on, I assigned an x64 application Software install into the TS (App-V client) to an x86 image!! Whoops!!
I ran through the deployment again with the correct version of the App-V client and as expected all was ok.
Issues Re-Imaging a Laptop
I’ve recently given a user another laptop to use and wanted to re-image the older one, I’ve usually had no problem with doing, so I deleted the computer out of the ConfigMgr Console and deleted the computer object from Active Directoy.
I then created the computer association and assigned it to my “Build” collection, after network booting the laptop I got a PXE error message.
pxe pending request id: XX
I knew the PXE\WDS role was configured correctly since I was able to image machines a few weeks ago and nothing had changed on the server
The status messages for the SMS_PXE_SERVICE_POINT showed the below.

The MAC address is the one I entered when creating the computer association.
Then I created a direct membership to my “Build” collection using:
Resouce Class – System Resource
Attribute name – System UUID
Value is the GUID
See Below

Click – Next

Click – Next
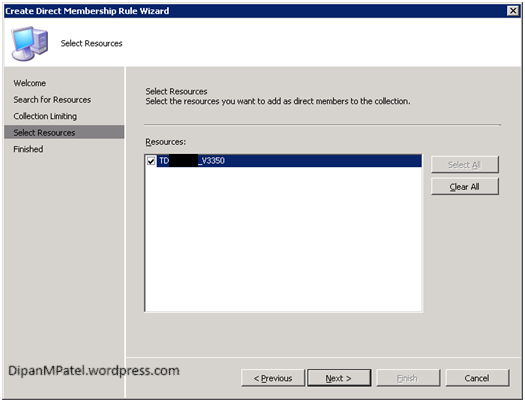
Here is when I noticed that this is the same computer I deleted from AD and the ConfigMgr console. Click – Next
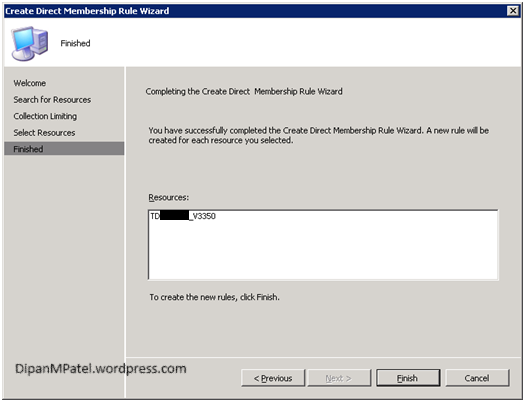
Click – Finish so see the Collection with both computers.
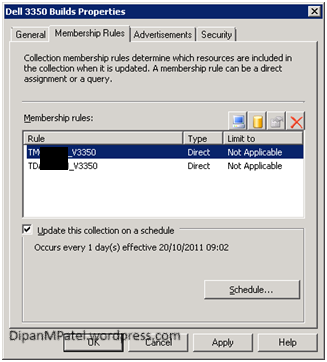
Above you can see both systems TMXXXXX_V3350 is the computer I imported using the MAC and TDXXXXX_V3350 which was created using the GUID in the SMS_PXE_SERVICE_POINT.
I’m not entirely sure what happened but I deleted it again waited 24hrs since it was already 17:00pm 🙂 then successfully PXE booted the laptop the following day.
I will mention the SQL DB is on a remote server but on the same subnet as the ConfigMgr site server. I suspect after originally deleting the computer from the console it hadn’t updated in SQL, but i’m not sure.
Failed to Capture the Reference Machine – Error 0x80070020
I was attempting to capture an image from my reference system and it looked like it was working until I got the below error message.

The error message reads: “Task Sequence: Image Capture Wizard failed with the error code (0x80070020). For more information, please contact your system administrator or Helpdesk Operator”
Next time I’ll remember to disable the Flash on my phone!!
Looking at the SMSTS.log I found the below errors. (I’m looking at the log file using Trace32)

“Failed to run the action: Capture the Reference Machine. The process cannot access the file because it is being used by another process”
I made the mistake of installing Anti-Virus software on my reference computer, once I uninstalled this then rebooted, the TS ran through OK and I got my image file. 🙂
Task Sequence has failed with error code 0X80070490
A few months back when I first decided to use ConfigMgr OSD to deploy my system image (Of Windows 7) to new machines I came across the below error message
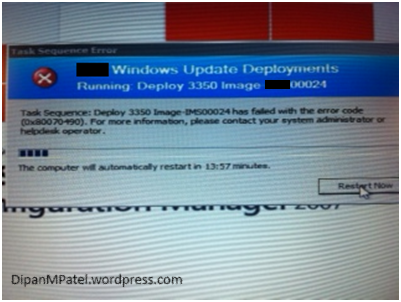
(I did remember to disable the flash on my phone this time, if you’ve seen my posts you’ll know what I mean)
Being new to ConfigMgr at the time I posted a question on the Microsoft System Centre Configuration Manager Forum (Link to original thread below)
The problem was my TS was deploying Image 1-1 which is the 100MB boot partition that Windows 7 creates during installation. This separate parition is not a requirement, one partition can be used for the boot manager\files and Windows OS.
I changed this to Image 2-2 and my TS ran through OK
I’ve found this post which explains it in more detail –
Creating Computer Associations
Under “Operating System Deployment” right click “Computer Association” and click “Import Computer Information”.

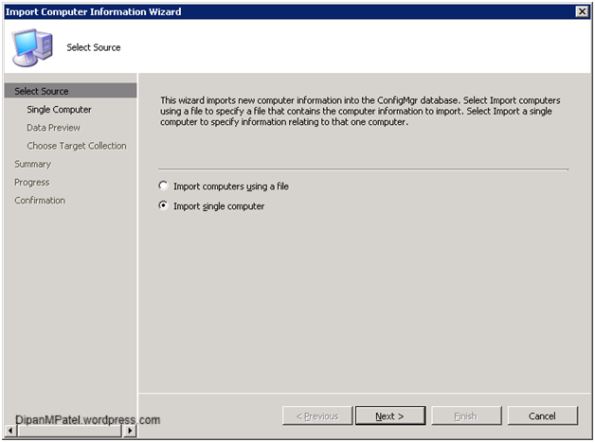
Select “Import Single Computer” and click “Next”
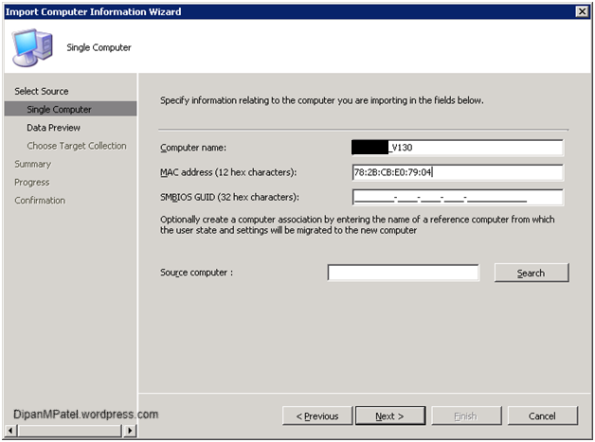
Enter in the computer name following the companies UNC and enter the MAC address of the machine and click “Next”
Note: You may have to take the machine through the initial setup to obtain the MAC address.
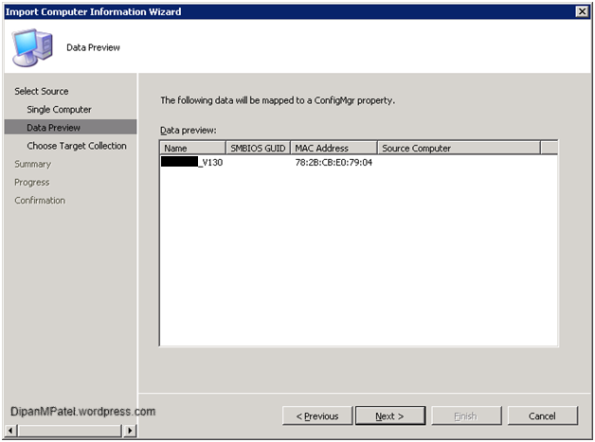
Click “Next”

Select “Add computers to the following collection” then click “Browse” and select “OSD Unknown Collection”

Click “Next”, click “Next” on the Summary page “Next” again on the progress and click “Close”

At this point all I needed to do was power on the laptop and boot to the network.
Advertising the Task Sequence
Right click on your TS in my case “Deploy v130 Image” under “Operating System Deployments\ Task Sequences” and click on “Advertise”

Click “Next” Make sure you place a tick in “Make this task sequence available to boot media and PXE”

Click on the yellow star and select “As soon as possible”, change the “Priority” to “High” using the drop down and select “Never rerun advertised program”
Then click “Next”

Match above and click “Next”

Click “Next”
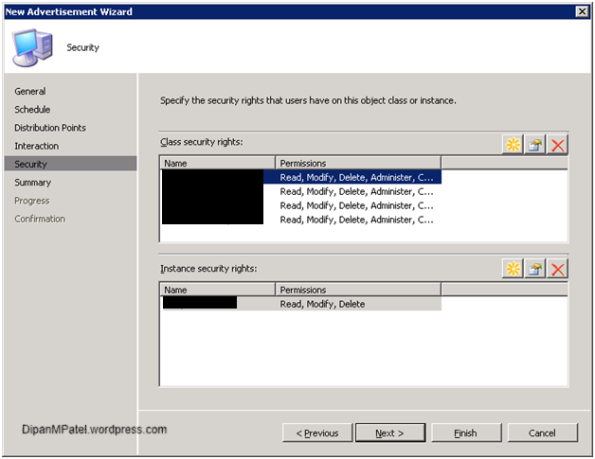
Click “Next”

Click “Next”

Click “Close”
Once this has been done you will need to create a Computer Association in SCCM see – “Creating a Computer Association”
At this point change the Boot sequence on the laptop from the BIOS. For older systems you may need to enable PXE Boot on the Network card via the BIOS.
The restart the laptop and the download and install will begin.
Adding Drivers into the Boot Image
You will need to add additional Network\HDD drivers to the default boot images. (The default images are Vista)
OSD Process
Step 1 client requests PXE image matching hardware architecture from PXE DP, Client will use the PXE distribution point use the boot image you specified. PXE is only used when the computer is booting to the network.
Step 2: PXE DP sends the requested boot image to client computer.
Step 3: The image being sent to the client must have the Network\HDD drivers injected into it. If these are not present the deployment will fail, up until now the client has been able to communicate with the SCCM server via PXE once the image gets downloaded it then requires the Windows drivers network to communicate. The HDD drivers must also be present otherwise image cannot be written to the client and the task sequence will fail. (E.g. SSD Drivers)
Step 4: The first part of the Task sequence includes another boot image that you specified from the main DP, the client then reboots using this new image.
Step 5: The sole purpose of this image is to boot the system and bring down the captured image. (Using the DP)
Step 6: Captured image is installed on the client.
Step 7: System reboots using the captured image.
Adding Drivers to the Boot Images
Extract the drivers if they are zipped and copy all the files to a share on the SCCM server. Provide this share the following permissions.
Everyone – Full\SYSTEM – Full\Local Administrator – Full\Domain Administrator – Full – (Keep in mind this is a lab)
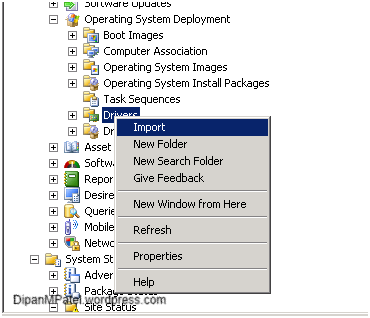
Expand Operating System Deployment under Computer Management, right click Drivers and select Import

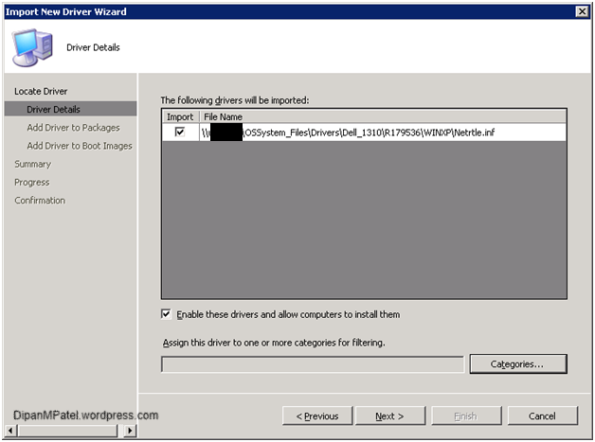
Browse to the driver files. If the driver is setup.exe there should also be a folder with contains the .inf, .cat and .sys files. Make sure when you browse to the driver you point to these files and not the setup.exe.
Click – Next
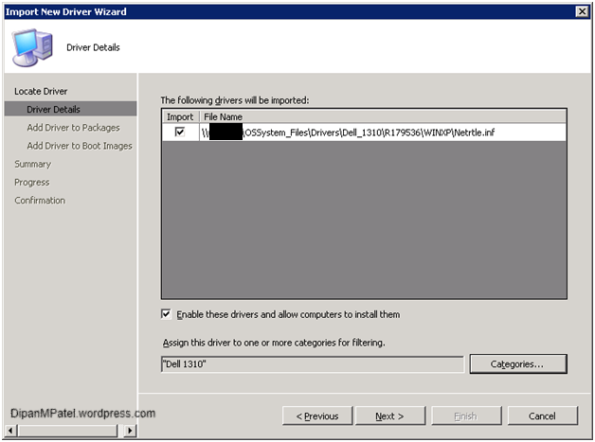
Click on Categories and enter in the laptop model and click “Add” this will allow you to group drivers

Click OK
Click Next

Above you can see other drivers I have imported for the Dell V130 laptop, click on New Package

Enter in a name and a UNC location where you want the package files to be kept and click OK

Click Next
Note: if I was planning on deploying the OS on the same day I would “Update distribution points when finished” since I’m not this can be unticked.
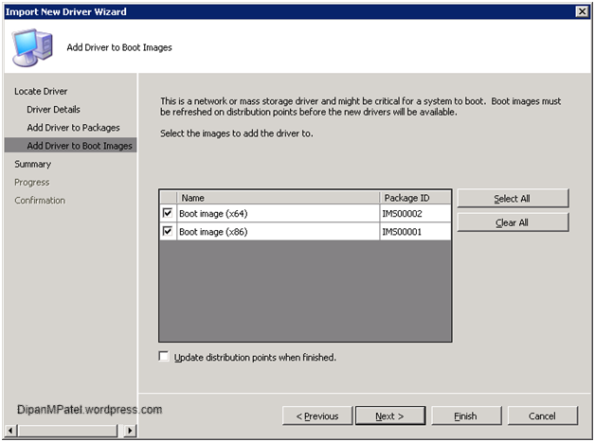
Select both boot images and click Next

Click Next
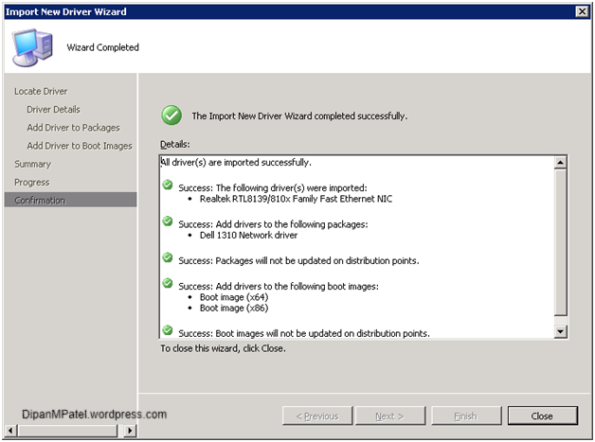
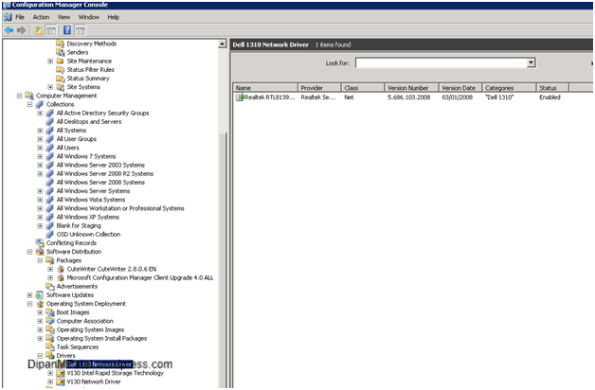
You can create folders by right clicking Drivers under Operating System Deployment and then moving the driver so it is better organised.
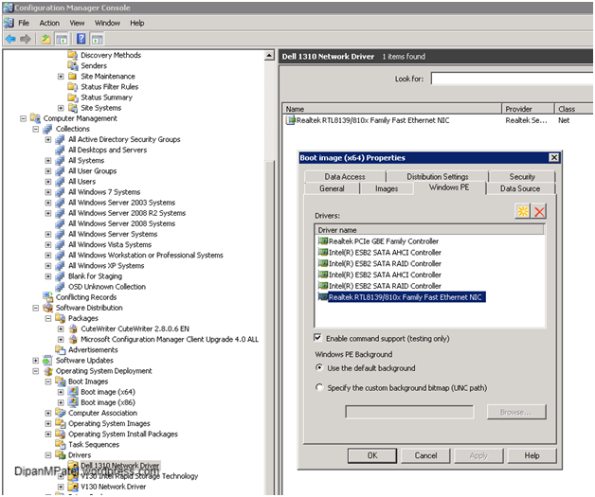
This driver should be in the boot image, you can check by right clicking a boot image then selecting properties then clicking on the WindowPE tab
Note: the driver name in the properties window and in the background.
You have now added the Network drivers, if you have more drivers to add follow the process again.
Initial Server and ConfigMgr Setup for OSD
To utilise SCCM OSD deployments you must have DHCP setup in your infrastructure. If you environment consists of more than one subnet you will need to enable IP Helper’s on the routers between subnets. Since IMS only have the one subnet this is not an issue.
1 – Server Setup for Windows Server 2008 R2
Install the Windows Deployment Service (WDS) Server role from Server Manager then restart the server.
Download the Microsoft Deployment Toolkit Update 1 x64 from Microsoft and install accepting all default settings.
2 – SCCM changes for OSD Deployments
Install the PXE Server Role on SCCM
Within the console, expand Site Management\Site_Code\Site Settings\Site Systems\Site_Server from the Actions Pane click on “New Roles”
Click “Next” on the first screen then select the “PXE Service Point” then click “Next”, click on “Yes” to accept the warning regarding firewall ports that will be opened and then place a tick in “Allow this PXE serviced point to respond to incoming PXE requests” then make sure the “Specify the PXE server response delay is set to 0” click “Next” twice then “Finish” Once installed the new role will appear with the other server roles.

Changing the Site Boundary to IP based
Expand Site Database\Site Management\IMS – SCCMDEV\Site Settings\Boundaries then click on New Boundary from the Actions pane.

Match the settings to the above image and click on Apply; you can then delete the old Active Directory boundary.
Note; we change the boundary to IP based because we have machines that are not members of the Active Directory domain so they need a way to communicate with Configuration Manager.
Computer Client Agent
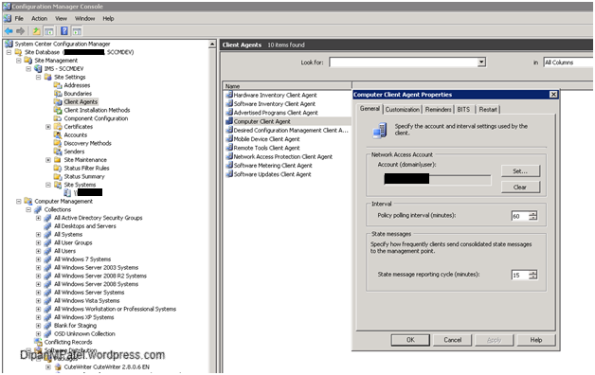
Right click Computer Client Agent and select Properties and under Network Access Account enter a username which has high privileges on the network then click OK.
Create a Computer Collection for OSD Staging
Right click “Collection” and select “New Collection” enter a description then accept all the defaults.
ConfigMgr Integration
Click Start\All Programs\Configure ConfigMgr Integration
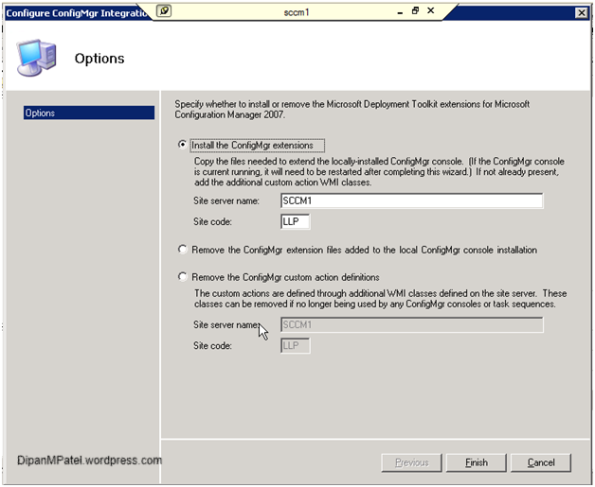
It will already pre-populate the fields with the site server name and site code, click Finish
Now the preparation is done for OSD.
IT IS IMPORTANT THAT YOU DO NOT MODIFY ANY WDS SETTINGS ON THE SCCM SERVER.
DO NOT MAKE ANY CHANGES IN THE DHCP SCOPE OPTIONS THEY ARE NOT NEEDED WHEN THE WDS SERVER AND
DHCP SERVER ARE ON SEPARATE SERVERS BUT ON THE SAME SUBNET.


